How to...
Install the toolchain
- Install Python 2.7
Warning
Windows users: DON’T FORGET to select Add python.exe to Path feature on the “Customize” stage.
- Launch the toolchain installation process
Go to Tools > Toolchain > Install. Be patient for the toolchain installation.
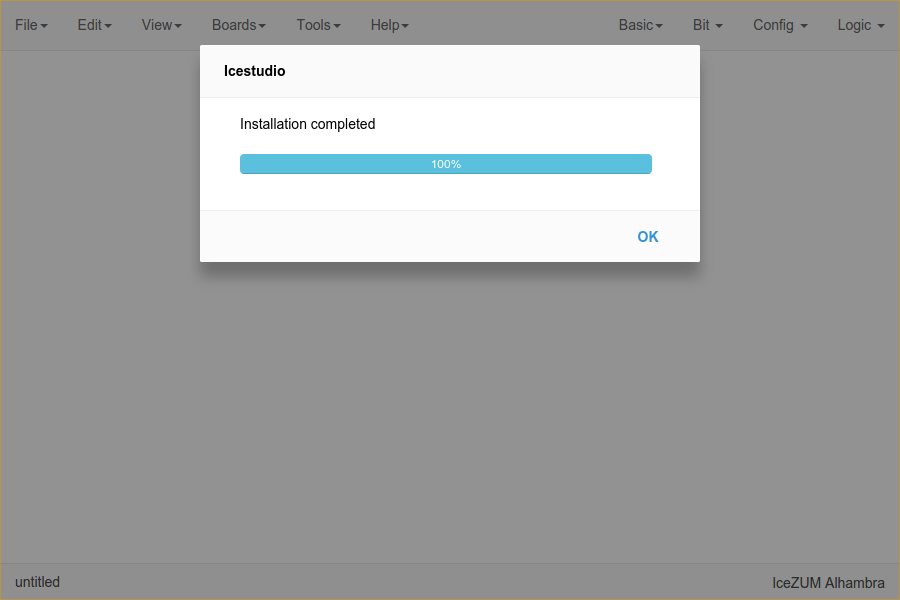
Note
When the toolchain is installed, the menu option changes to Tools > Toolchain > Update. Also, the toolchain can be restored to default in Tools > Toolchain > Reset default.
Update the toolchain
- Connect to the Internet
- Launch the toolchain updating process
Go to Tools > Toolchain > Update. Be patient for the toolchain update.
Install the drivers
- Install the toolchain (required for Windows)
- Enable the FTDI drivers
Go to Tools > Drivers > Enable. Each OS has a different process. This configuration requires administration privileges.
Note
To revert the drivers configuration go to Tools > Drivers > Disable
Create a project
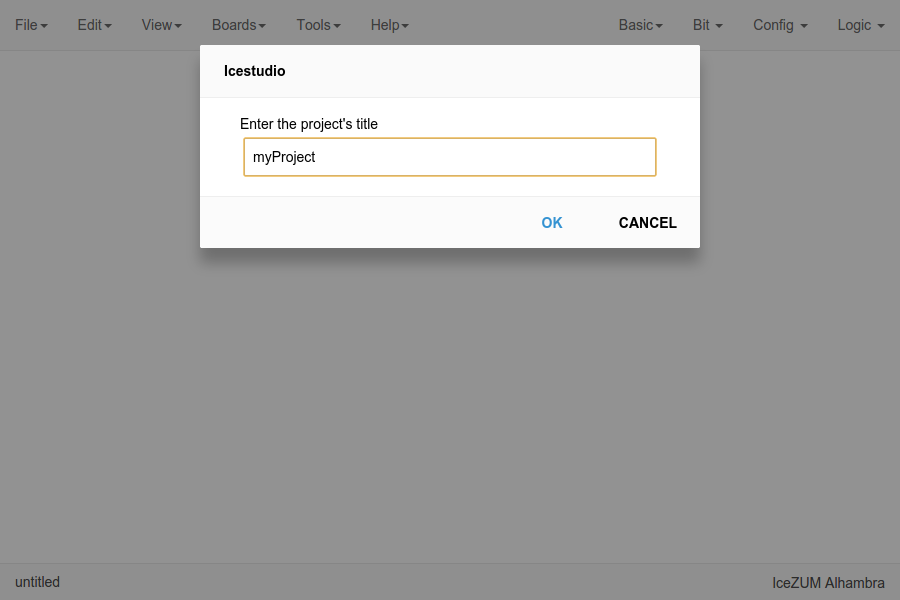
Create a new project
Go to Edit > New project, write your project’s name and press OK.
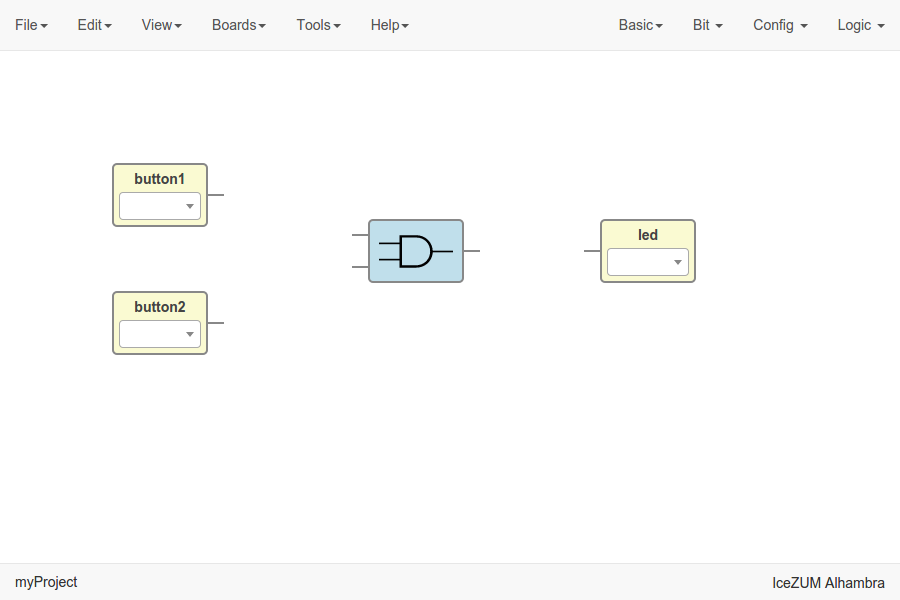
- Add your blocks
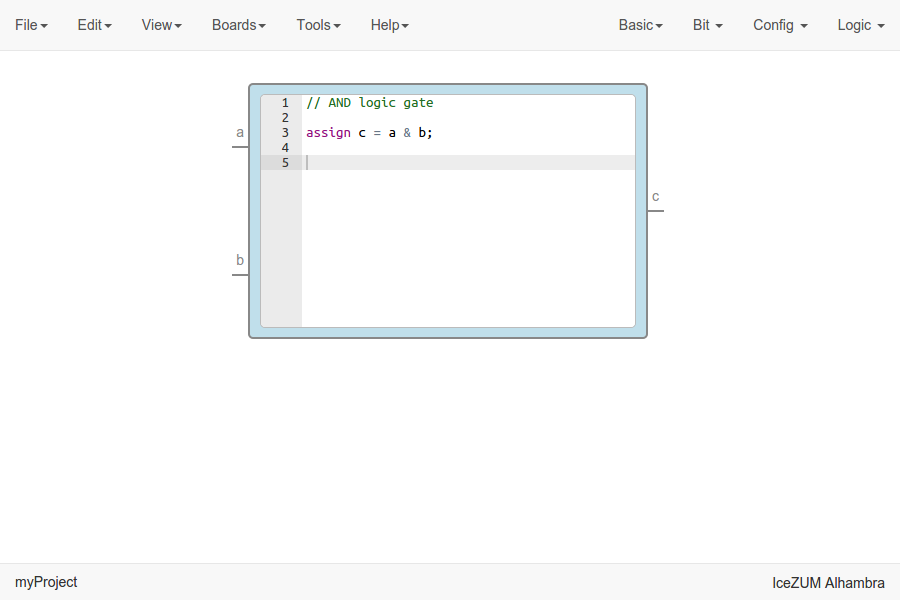
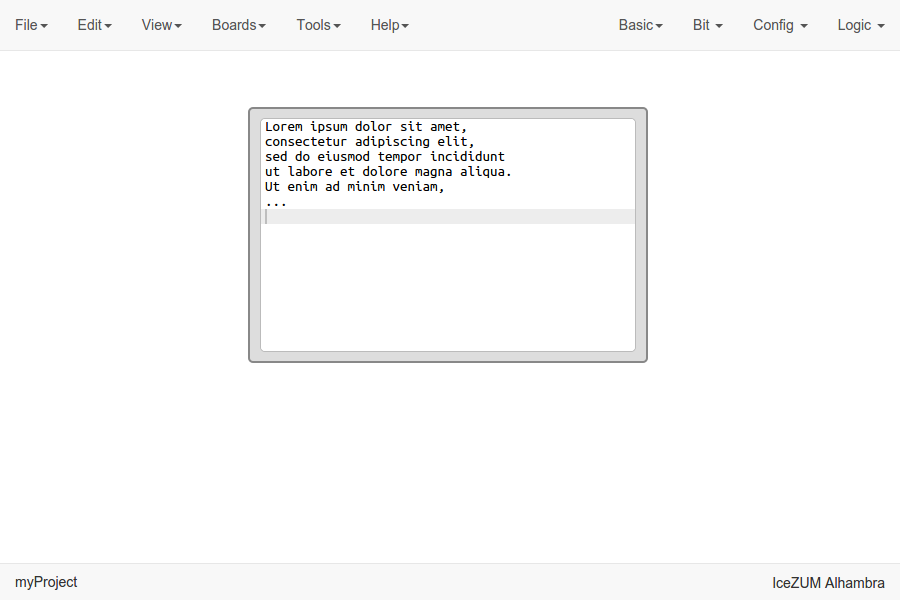
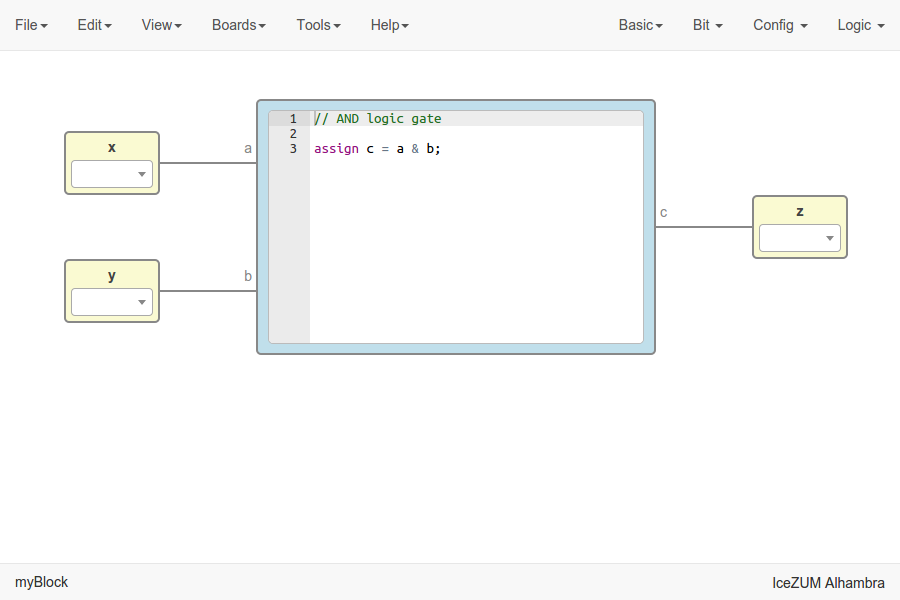
Code blocks
Click on Basic > Code, add the code ports. Port names are separated by a comma. E.g.:
a, b.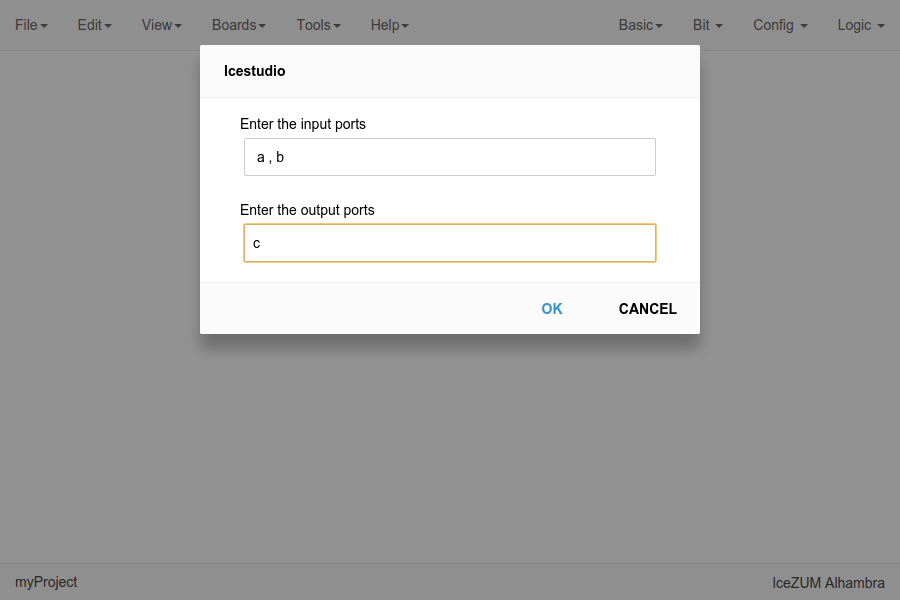
This block contains a text editor to write your module in verilog code. Module header and footer are not required.
Info blocks
Click on Basic > Info.
This block contains a text editor to add comments about the project.
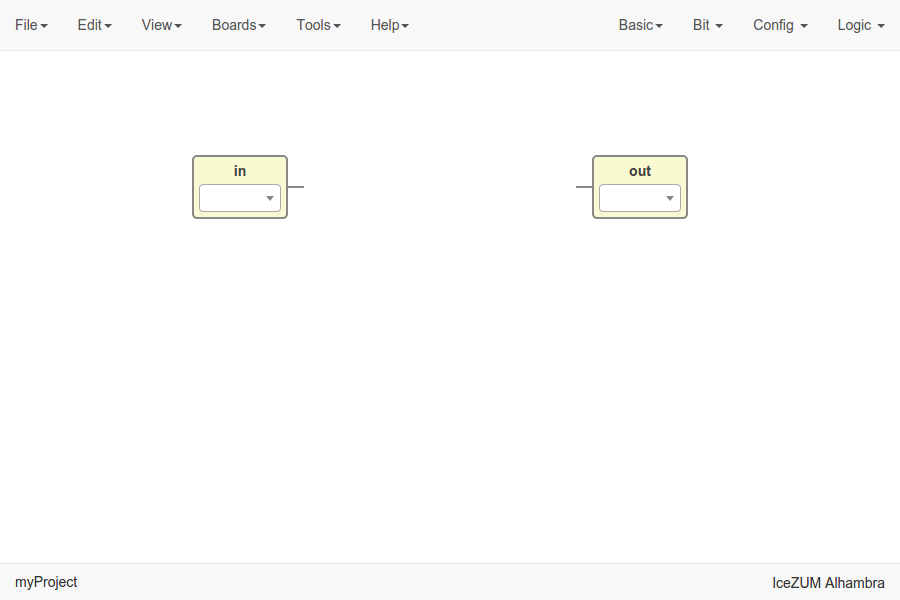
Input/Output blocks
Click on Basic > Input or Basic > Output, write the block’s name and press OK.
These blocks contain a FPGA pin selector depending on the selected board.
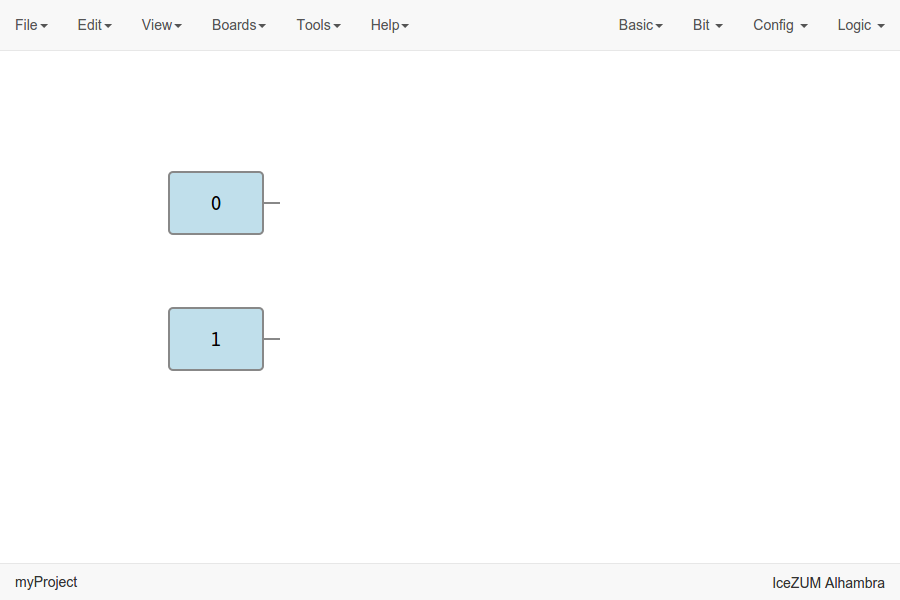
Bit blocks
Click on Bit > 0 or Bit > 1.
These blocks are low and high logic drivers.
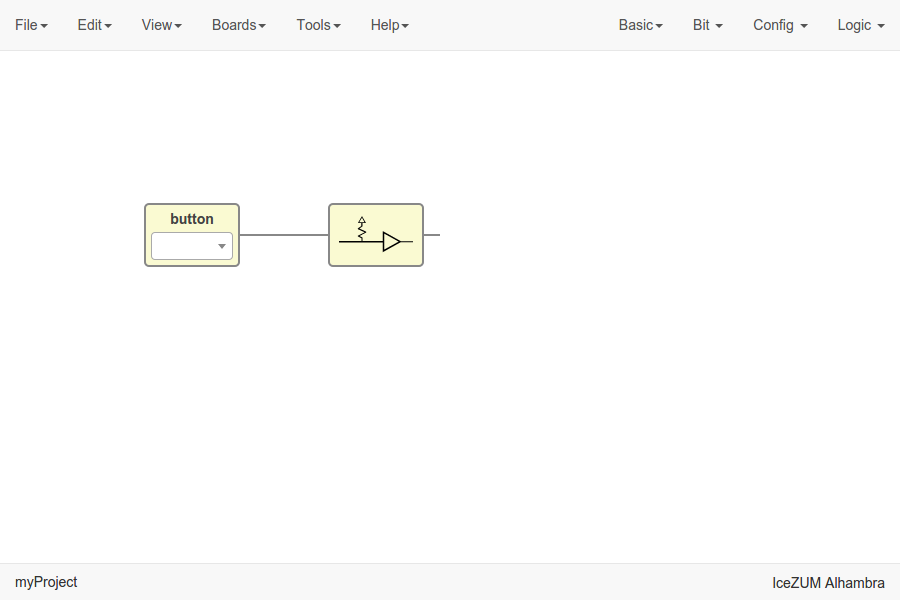
Config block
Click on Config > Pull up / Pull up inv / Tri-state.
The Pull up block must be connected to input ports in order to configure a pull up in the FPGA.
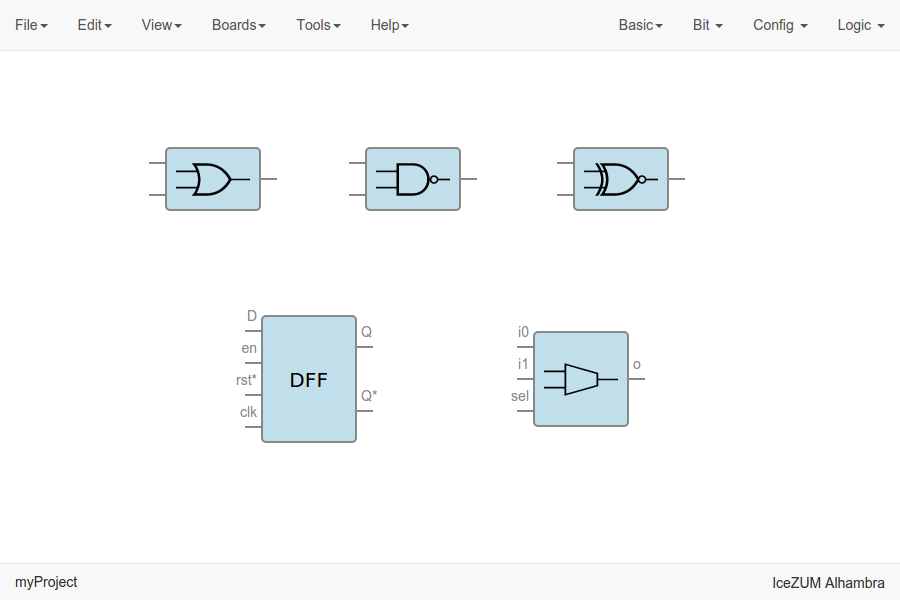
Logic blocks
Go to the Logic menu and select. This menu contains Logic Gates, Combinational blocks and Sequential flip-flops.
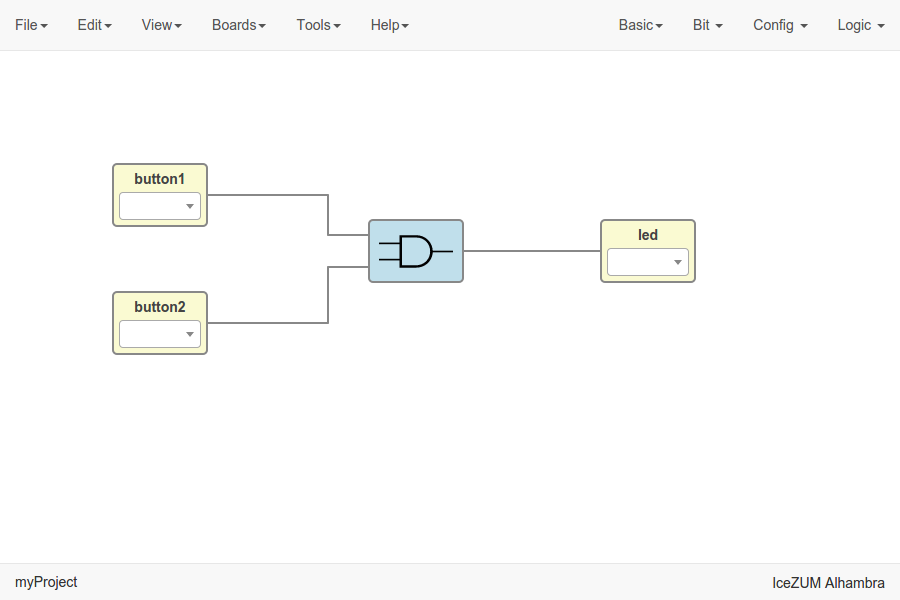
- Connect your blocks
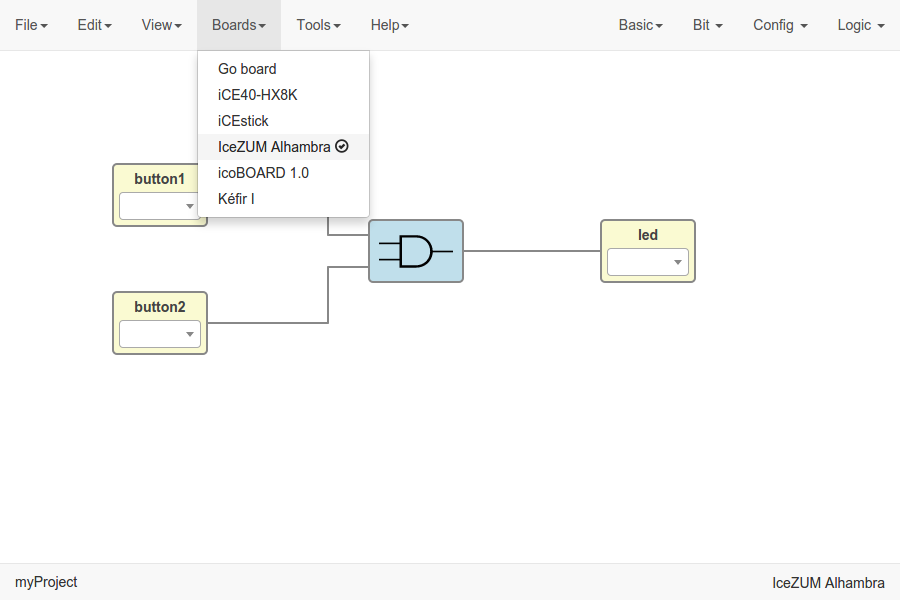
Select your board
Go to Boards menu and select Go board, iCE40-HX8K, iCEstick, Icezum Alhambra, icoBOARD 1.0 or Kéfir I.
Set FPGA I/O pins
Select all Input/Output blocks’ pins.
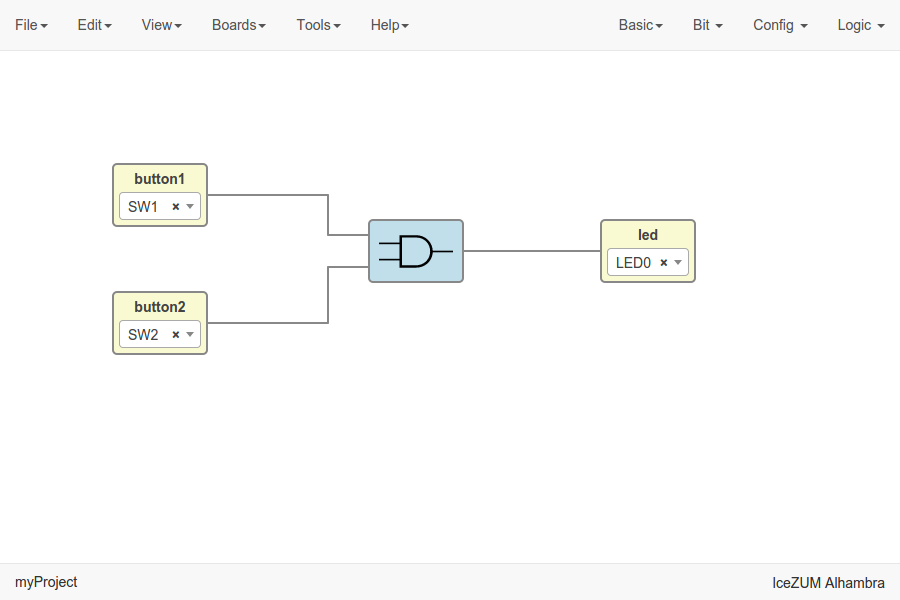
Save the project
Go to Edit > Save:
It will be saved as an .ice file.
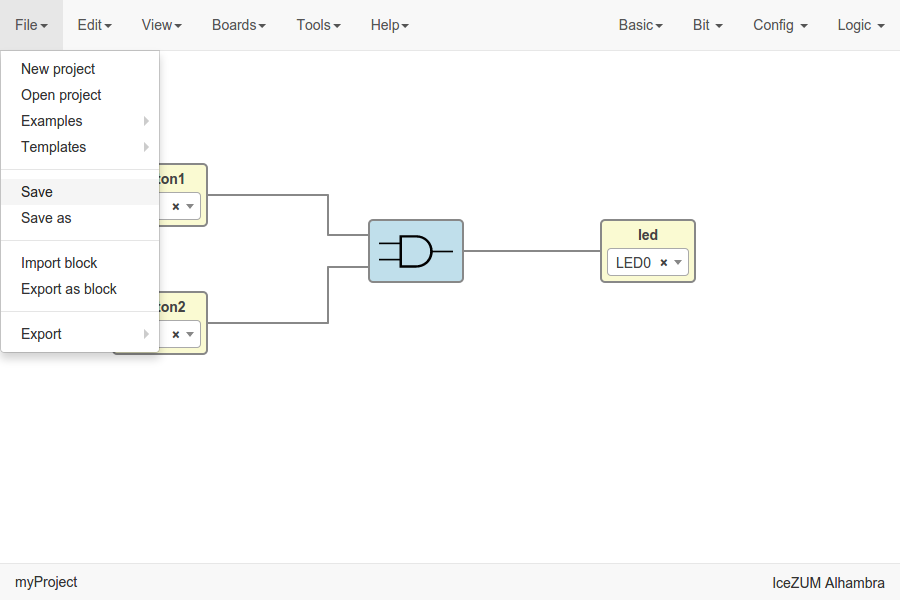
Upload a bitstream
Open a project
Go to Edit > Open project and select an .ice file.
Verify the project
Go to Tools > Verify.
This option checks the generated verilog code using
apio verify.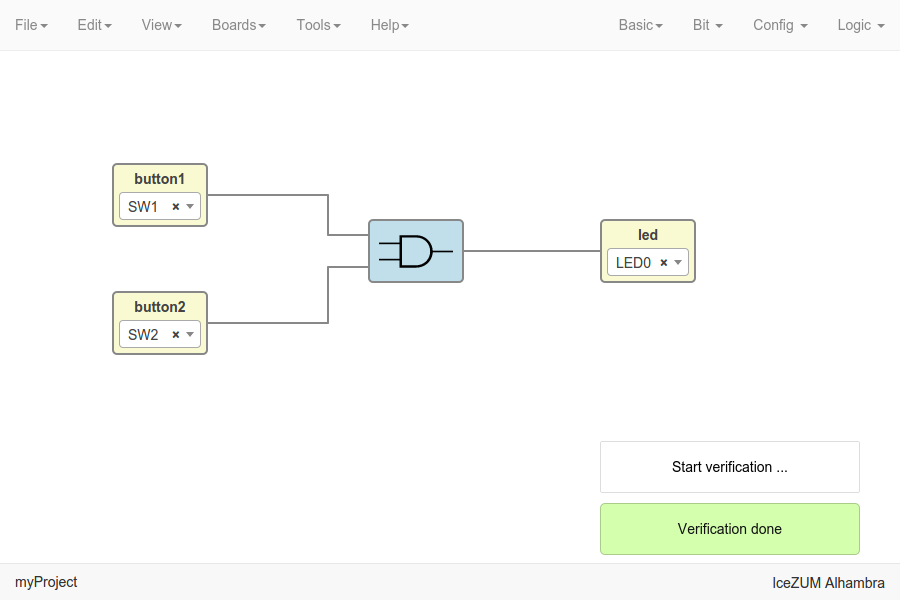
Build the project
Go to Tools > Build.
This option generates a bitstream using
apio build.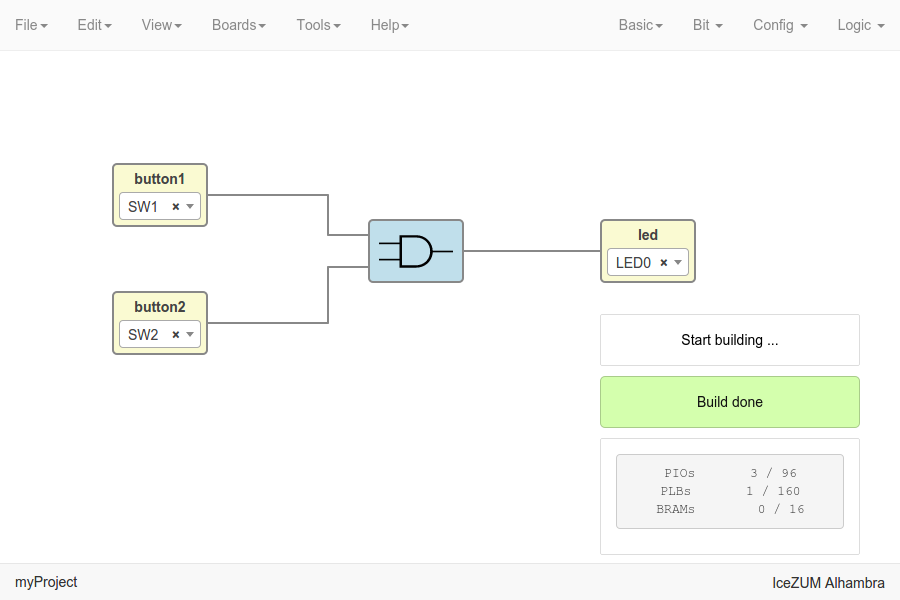
Upload the project
Connect your FPGA board and press Tools > Upload. This option uses
apio upload.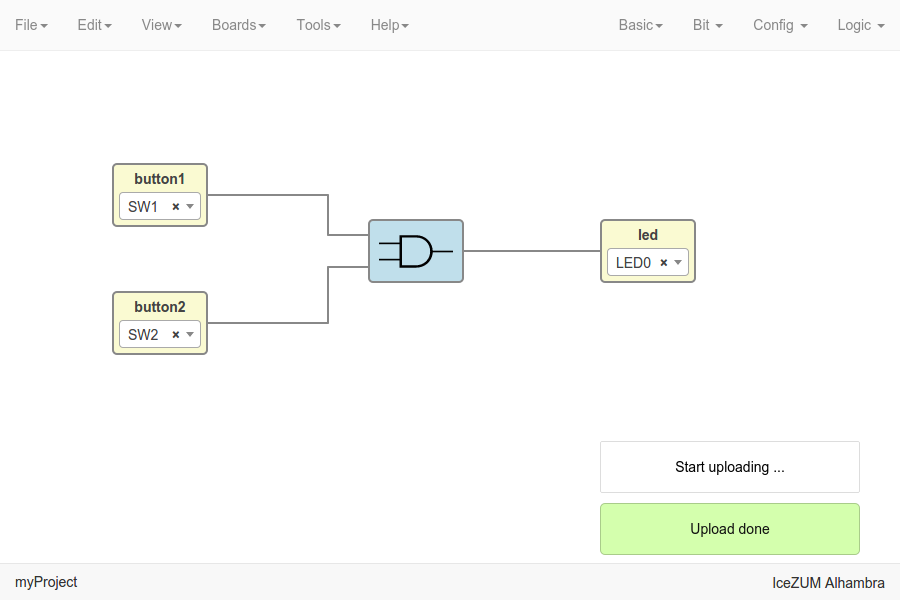
Create a block
Open a project
Go to Edit > Open project and select an .ice file.
Verify the project
Go to Tools > Verify.
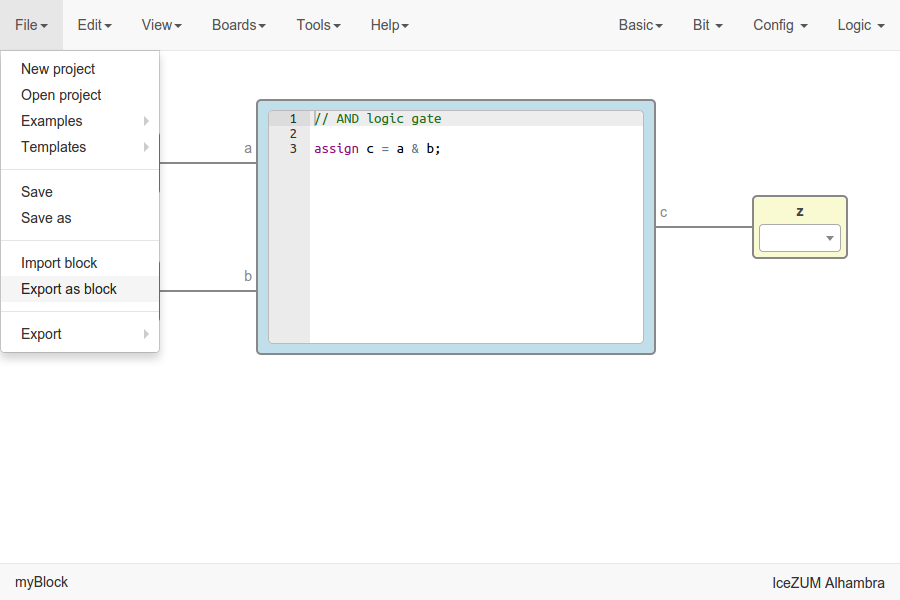
Export the project as a block
Go to Edit > Export as block.
It will be saved as an .iceb file.
Note
Input/Output blocks will become new Block I/O pins.
Use a custom block
- Open or create a new project
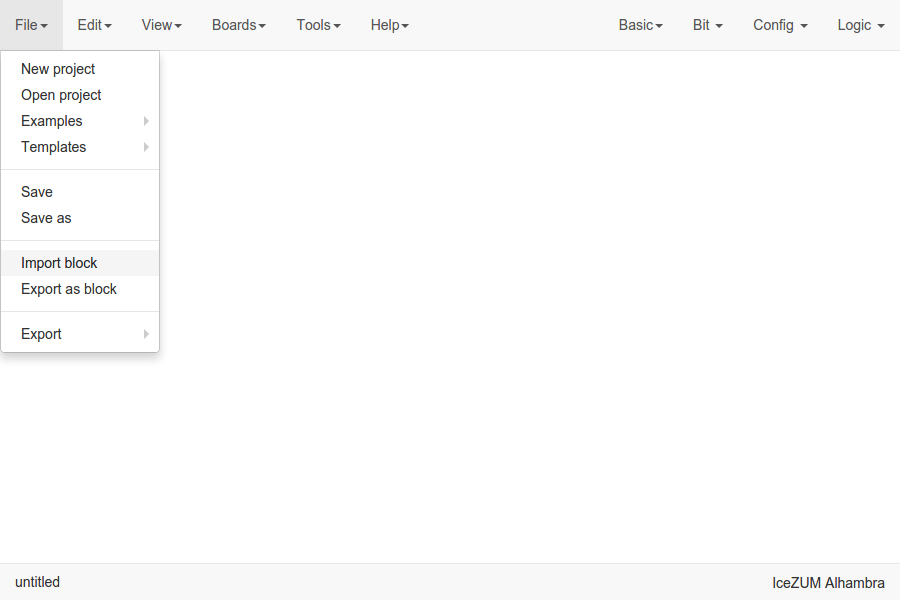
Import the custom block
Go to Edit > Import block and select an .iceb file.
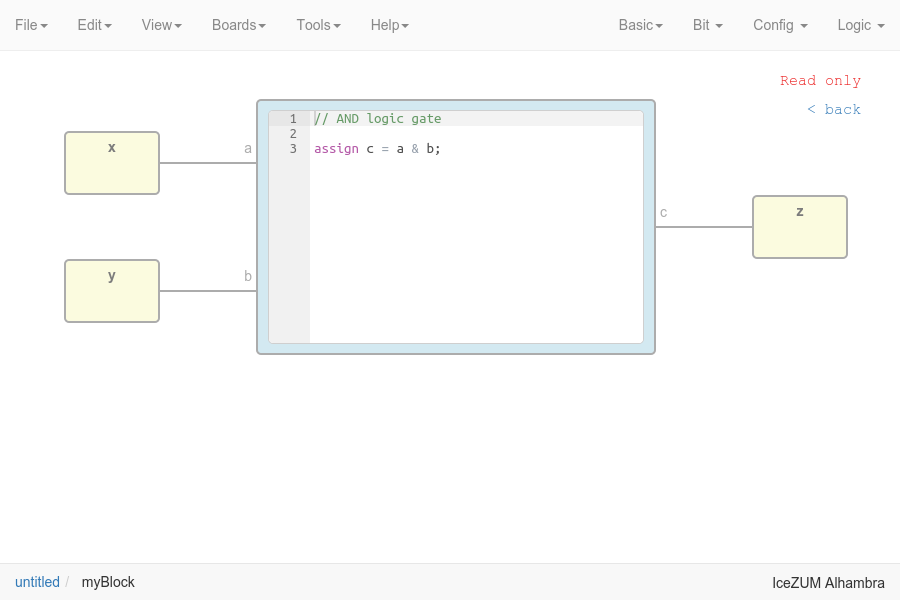
Examine the custom block
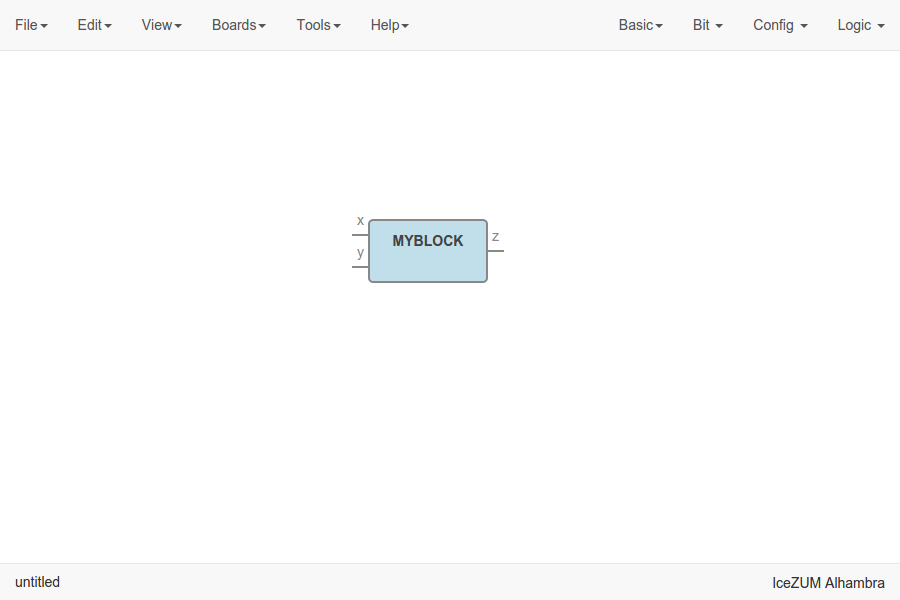
Complex blocks can be examined by double clicking the block.
Include a list file
If your code block contains a list file(s), for example:
$readmemh("rom.list", rom);
- Save the ice project
- Copy the list file(s) in the project directory
- Build and upload the project
Include a verilog (header) file
If your code block includes a verilog (header) file(s), for example:
// @include lib.vh
// @include math.v

`include "lib.vh"
- Save the ice project
- Copy the verilog (header) file(s) in the project’s directory
- Build and upload the project
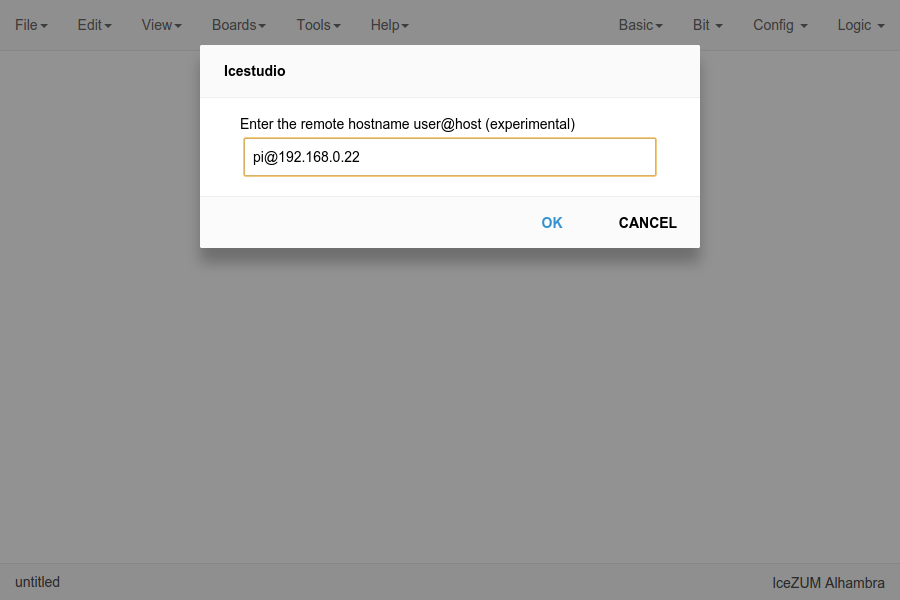
Configure a remote host
I you want to use a RPi, eg pi@192.168.0.22, or another computer from Icestudio as a client, first configure the host:
- Copy your SSH public key into the server
$ ssh-keygen
$ ssh-copy-id -i .ssh/id_rsa.pub pi@192.168.0.22
- Install apio in the server
$ ssh pi@192.168.0.22
$ sudo pip install -U apio
$ apio install --all
$ apio drivers --enable  # For FTDI devices
Enter the host name in Icestudio, Edit > Remote hostname
Now, Verify, Build and Upload tools will run in the selected host