User Guide
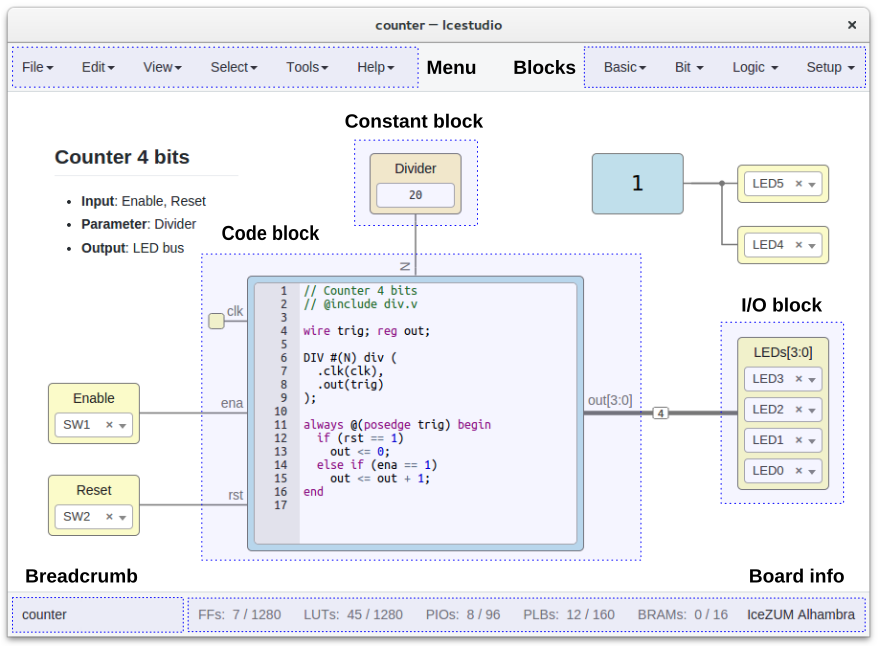
Menu
File
| Action | Description | Shorcuts | Mac OS |
|---|---|---|---|
| New | Create a new window | Ctrl+N | ⌘+N |
| Open… | Open a project | Ctrl+O | ⌘+O |
| Blocks | Open the blocks from the selected collection | ||
| Examples | Open the examples from the selected collection | ||
| Add as block… | Add a project as a block | ||
| Save | Save the current project | Ctrl+S | ⌘+S |
| Save as… | Save the current with a new name | Ctrl+Shift+S | Shift+⌘+S |
| Export… | Export multiple output files | ||
| Quit | Close the application | Ctrl+Q | ⌘+Q |
Note
The exportable files are: Verilog, PCF, Testbench, GTKWave, BLIF, ASC and Bitstream
Edit
| Action | Description | Shortcut | Mac OS |
|---|---|---|---|
| Undo | Undo the last change | Ctrl+Z | ⌘+Z |
| Redo | Revert the last undo | Ctrl+Y | Ctrl+Shift+Z | ⌘+Y | Shift+⌘+Z |
| Cut | Cut selected blocks | Ctrl+X | ⌘+X |
| Copy | Copy selected blocks | Ctrl+C | ⌘+C |
| Paste | Paste copied blocks | Ctrl+V | ⌘+V |
| Select all | Select all the blocks | Ctrl+A | ⌘+A |
| Fit content | Fit the content into the screen | Ctrl+1 | ⌘+1 |
Preferences
Language
The supported languages are:
- English
- Spanish
- French
- Chinese
- Galician
- Basque
- Catalan
Board rules
Enable or disable globally the board rules. These rules allow to automate tasks such as default port connections or default pin values. For example, the IceZUM Alhambra rules are:
- All not connected “clk” ports are connected to the internal CLK signal.
- All not used LEDs are turned off.
More information in the Board rules section.
External collections
Set the external collections path in your system. This absolute route should contain Icestudio collections (directories or symbolic links to directories) that will be loaded as external collections.
Remote hostname
Set the hostame of a remote device with an FPGA board connected. The format is user@host. For example, pi@192.168.0.22. Verify, Build and Upload functions will be executed in this host, that must have apio pre-configured.
Project information
Contains all the information about the project:

- Name: project name
- Version: version number
- Description: information shown in the block tooltip
- Author: creator of the project
- Image: SVG shown in the block body
View
| Action | Description |
|---|---|
| PCF | Show the board PCF file |
| Pinout | Show the board SVG pinout |
| Datasheet | Open a web browser with the board datasheet |
| Board rules | Show the current board rules |
| Collection info | Show the current collection README file |
| Toolchain output | Show the output of the latest executed command |
| FPGA resources | Show / Hide the used FPGA resources |
Select
Board
Select the FPGA board. The supported boards are:
HX1K
HX8K
LP8K
When a board is selected all I/O block combos are updated and its current values reset.
Hint
This information is stored in the app/resources/boards directory. In order to support a new board just create a new directory with the info.json, pinout.pcf and pinout.svg (optional) files with its information. The pinout.json file must be generated from the pinout.pcf using the generator.py script.
Collection
Select the Collection from the internal collections installed (from Tools > Collections) or the external collections (from Edit > Preferences > External collections).
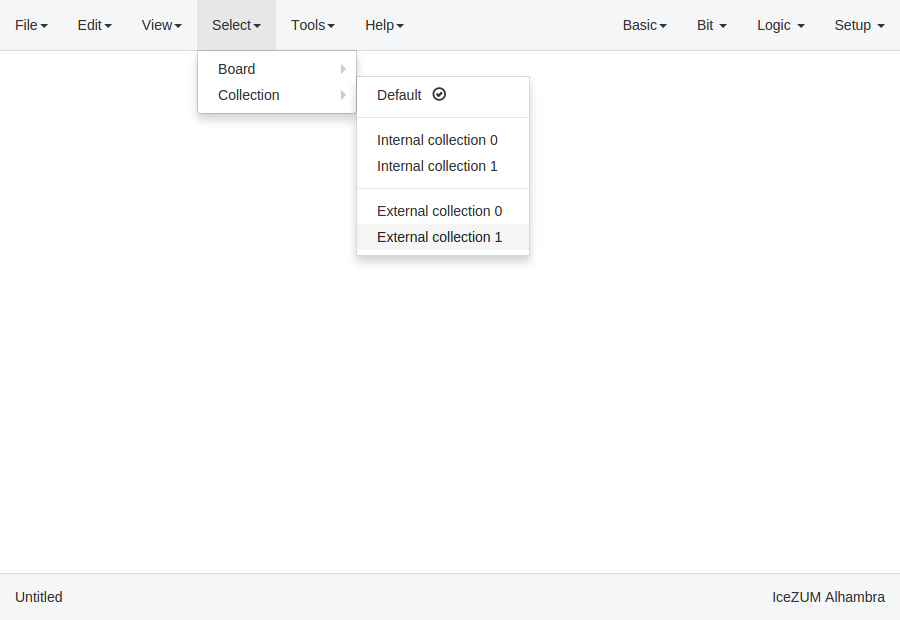
A collection is composed by blocks and examples. When a collections is selected, the following sections are updated with the collection content:
- File > Blocks
- File > Examples
- Menu blocks
Note
The Default collection is always available, and contains the blocks and examples distributed within the application.
Tools
| Action | Description | Shortcut | Mac OS |
|---|---|---|---|
| Verify | Check the generated verilog code | Ctrl+R | ⌘+R |
| Build | Synthesize the bitstream from the design | Ctrl+B | ⌘+B |
| Upload | Synthesize (if required) and upload the bitstream to the FPGA | Ctrl+U | ⌘+U |
Toolchain
| Action | Description |
|---|---|
| Install/Update | Install a virtualenv, apio and the required apio packages. It requires Python 2.7 |
| Remove | Remove the toolchain directories |
| Reset default | Restore the default toolchain distributed within Icestudio |
| Apio version | Show the current apio version |
Drivers
| Action | Description |
|---|---|
| Enable | Launch the FTDI drivers configuration. Each OS has a different process |
| Disable | Revert the FTDI drivers configuration. Each OS has a different process |
Collections
| Action | Description |
|---|---|
| Add | Add a ZIP file with one or more collections |
| Reload | Reload all the collections from the files |
| Remove | Remove the selected collection |
| Remove all | Remove all the collections |
Note
A collection is composed by blocks and examples sorted by categories (directories). The package.json file is required and contains information about the collection. The locale directory is optional and contains the translations for the blocks and examples. A collection has the following structure:
Collection/
├── blocks/
├── examples/
├── locale/
├── LICENSE
├── package.json
└── README.md
A ZIP file of collections contains one or more Collection directories at the main level. A collection can be selected in Select > Collections.
More information in the Default collection.
Hint
When a ZIP file of collections is added to Icestudio, it is installed in ~/.icestudio/collections.
Help
| Action | Description |
|---|---|
| View license | Open the Icestudio license in a web browser |
| Version | Show the Icestudio current version |
| Documentation | Open the Icestudio documentation in a web browser |
| Source code | Open the Icestudio source code in a web browser |
| Community forum | Open the FPGAwars forum in a web browser |
| About Icestudio | Information about the application |
Design
This is the main panel. It contains the blocks and the wires.
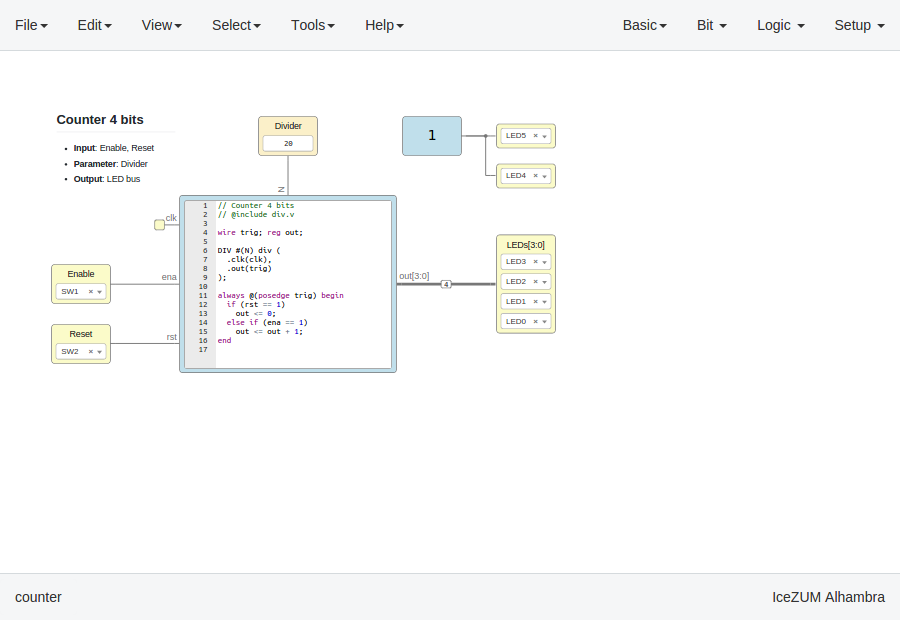
Pan & Zoom
Pan is performed using the Ctrl + mouse left button or mouse right button over the background. Zoom is performed using mouse wheel.
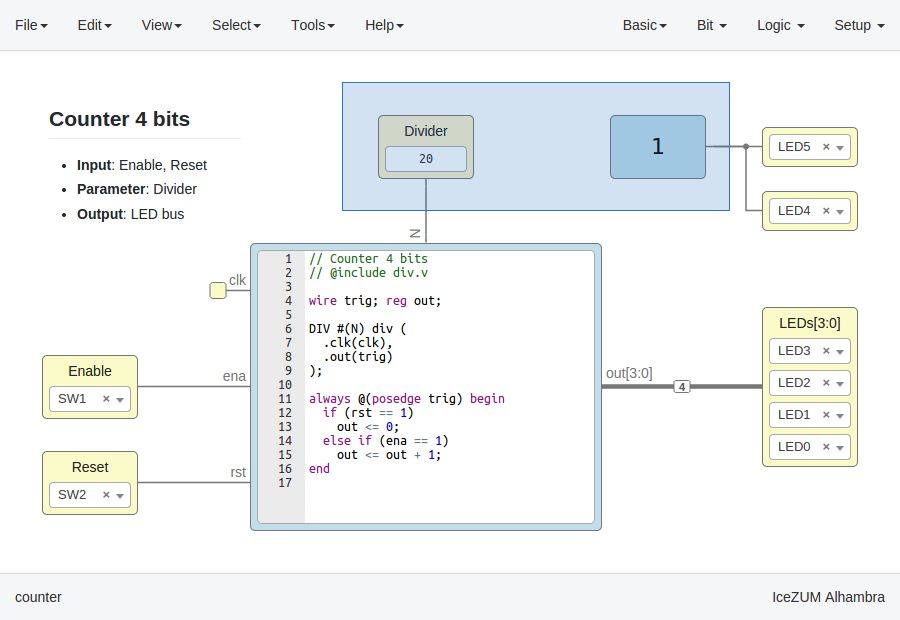
Select
Block selection is performed with the mouse left button. Blocks can be selected/unselected individually using Shift+left-click. In addition, several blocks can be selected by a selection box. A selection is canceled when the background is left-clicked.
Move blocks
Any block or blocks selection can be moved in the design using the mouse left button over the block or the selection. Also a blocks selection can be moved with the arrow keys.

Resize text blocks
Memory, Code, and Information blocks can be resized with the resize tool in the bottom-right corner of the block.
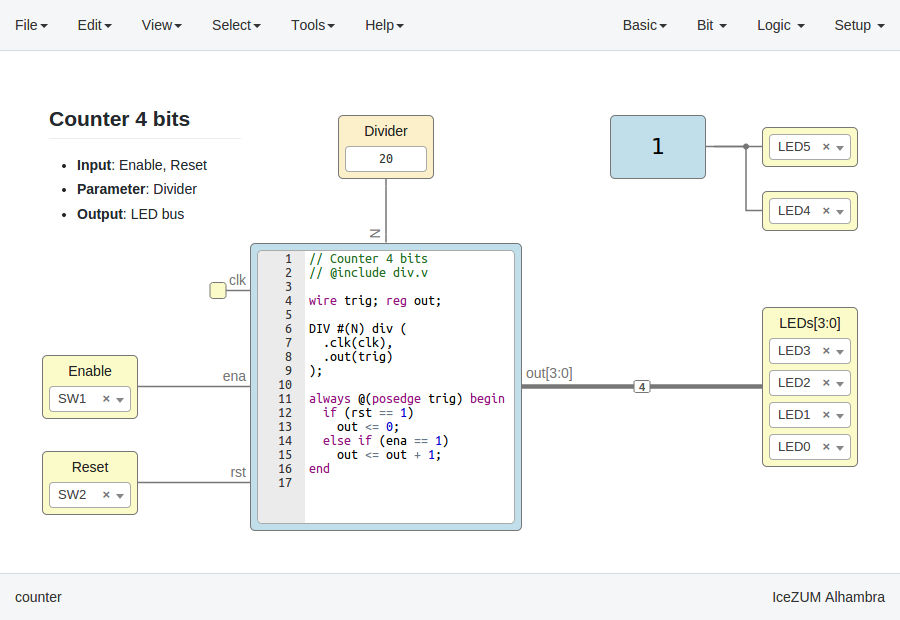
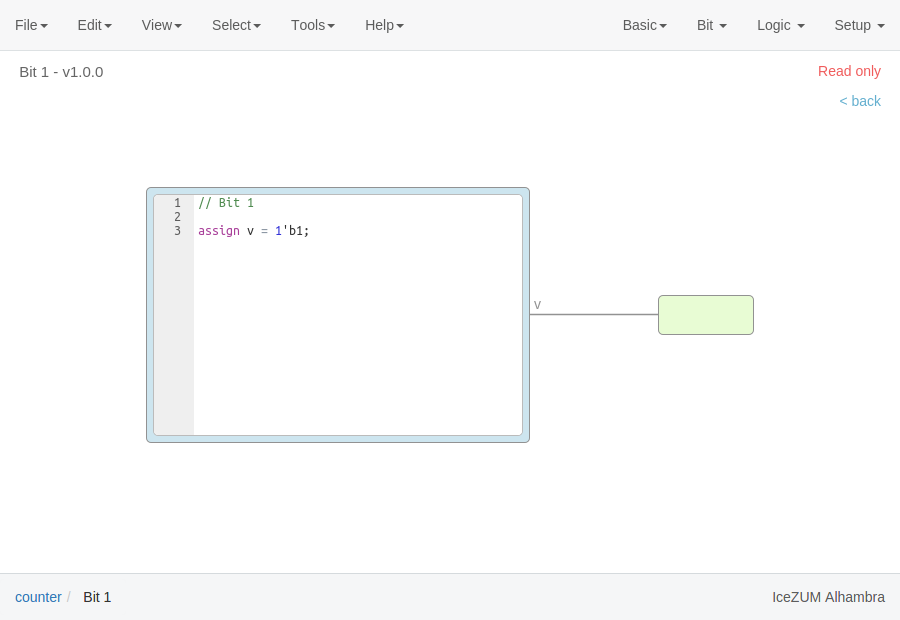
Block examination
Non-basic blocks can be read only examined by double clicking the block using the mouse left button. This is a recursive action. In order to go back, click on the < back link or press the back key.
During the examination, pan, zoom and code navigation are enabled. Also the ‘Fit content’ action.
Note
The examination path is stored in the breadcrumbs. This allows to go back to any previous block.
Verilog error detection
The Verify, Build and Upload errors are captured and showed in the design with a notification.
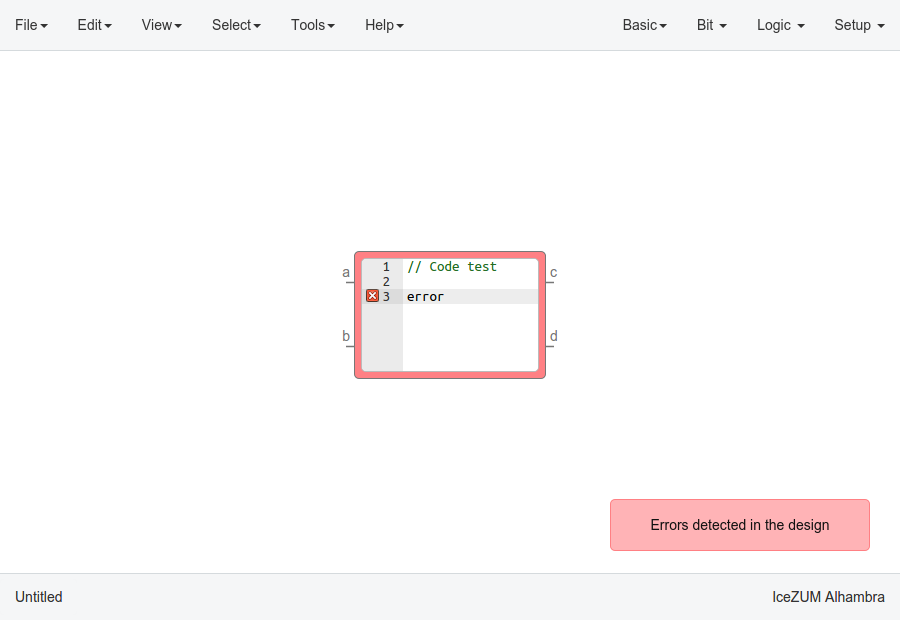
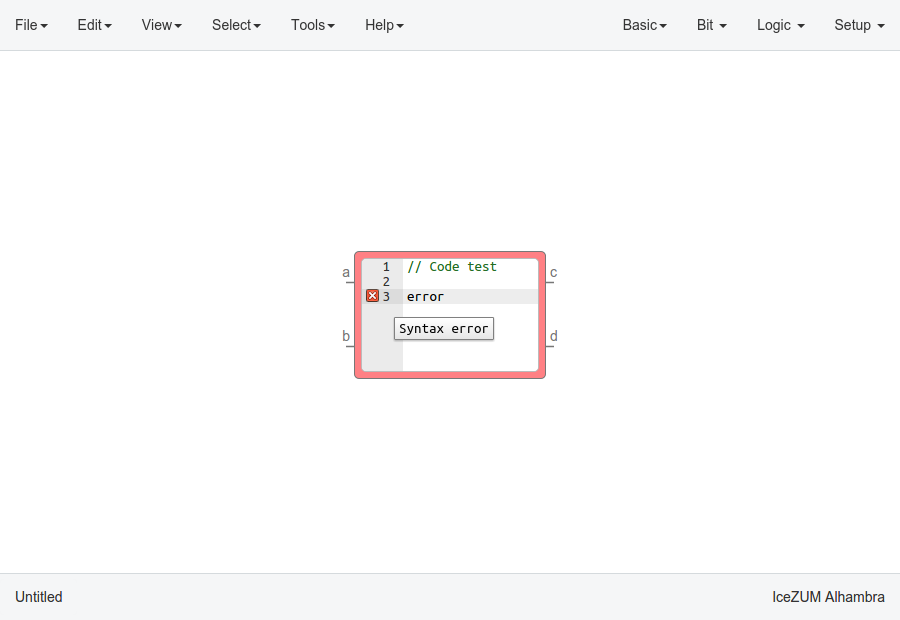
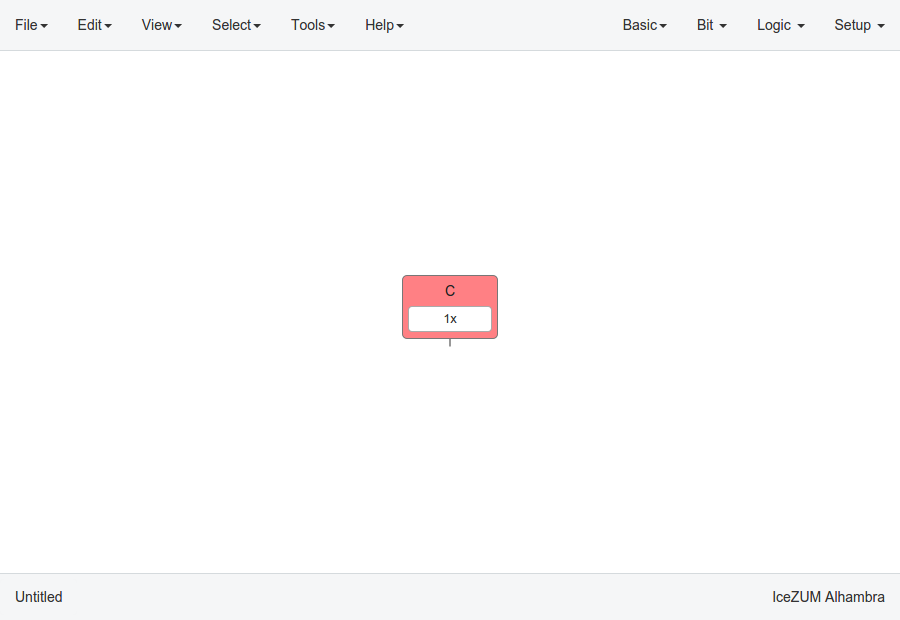
If the error comes from a Code block it is marked in red an inline annotation is set:
If the error comes from a Constant block it is marked in red.
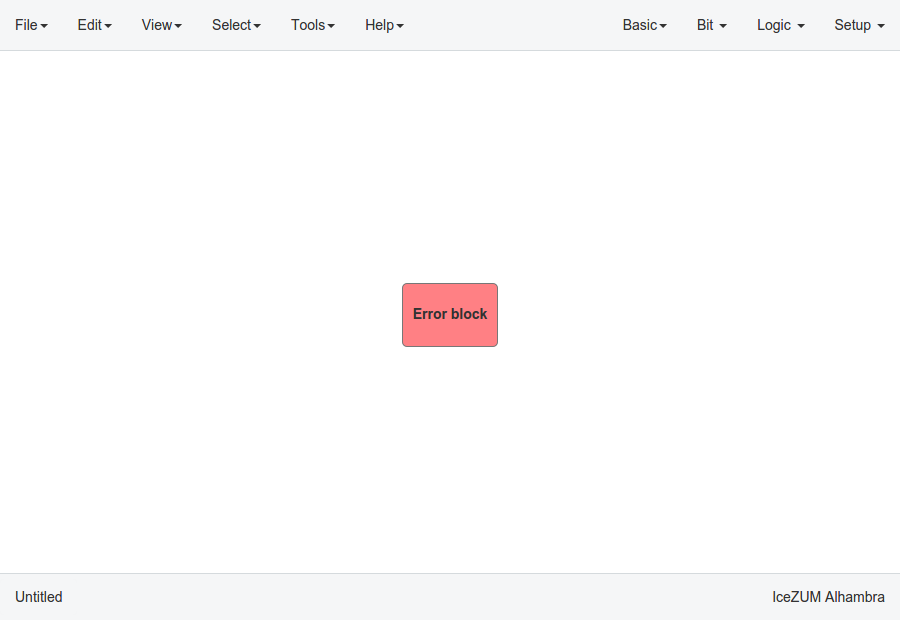
If the error comes from a Generic block it is marked in red.
Undo/Redo
Icestudio allows to undo/redo the following actions:
- Add or remove a block.
- Add or remove a wire.
- Move a block or a blocks selection.
- Edit an I/O block: name, type and value.
- Edit a Constant block: name, type and value.
- Edit a Memory block: name, type, format and value.
- Edit a Code block: ports, parameters and content.
- Edit an Information block: type and content.
- Change the board.
- Change the language.
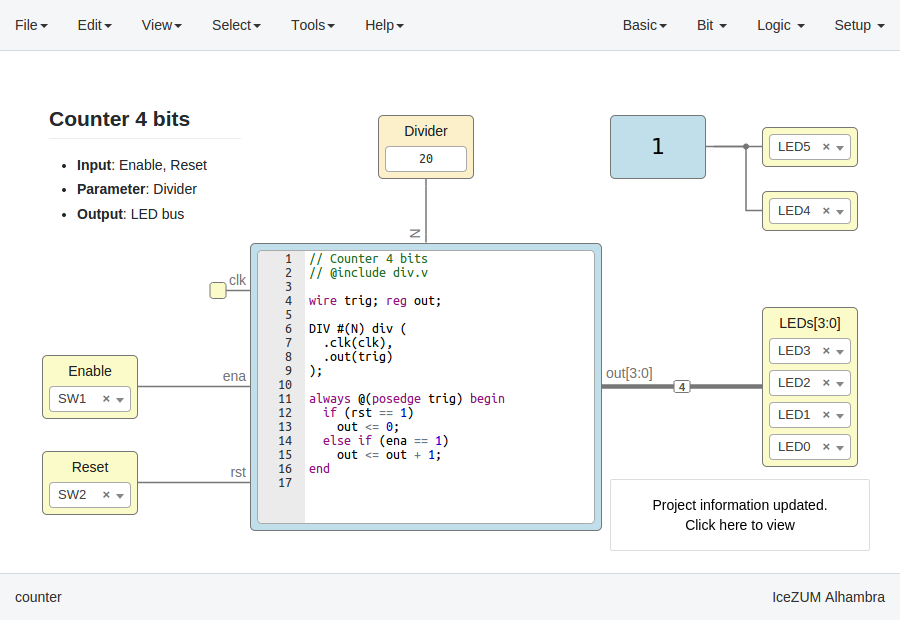
- Change the Project information: when undo/redo a Project information change, a clickable notification will appear to access the Project information section.
Take a snapshot
Taking a png snapshot of the application is as easy as press Ctrl+P. A save dialog appears to set the name and the path of the captured image.